VPS Domain: Difference between revisions
Unknown025 (talk | contribs) |
|||
| (5 intermediate revisions by 2 users not shown) | |||
| Line 1: | Line 1: | ||
Here are two options for domains. | |||
== Setting up Custom Domain via Namecheap == | == Setting up Custom Domain via Namecheap == | ||
Essentially, for | Essentially, for Namecheap, just follow [https://wiki.helionet.org/Namecheap_DNS_Records this] tutorial and be sure to ask an administrator (tell them your domain) to set up your DNS if you are using HelioHost's nameservers. That's really all you need to do. | ||
== Setting up Custom Domain via Cloudflare == | == Setting up Custom Domain via Cloudflare == | ||
[[File:customdomain3.jpg]] | [[File:customdomain3.jpg|500px|right]] | ||
First | First, let's configure DNS. Go to the DNS option on the dashboard and then to Records. | ||
[[File:customdomain5.jpg]] | [[File:customdomain5.jpg|500px|right]] | ||
Grab | Grab the IPv4 address from your HelioHost email and create an <code>A</code> record. Do the same with the IPv6 address and <code>AAAA</code> record. Also, feel free to make a CNAME record (which will allow <code>www</code> to redirect to your main site). | ||
[[File:customdomain4.jpg]] | [[File:customdomain4.jpg|500px|right]] | ||
Now | Now, on to the Hestia control panel. Go to Users, find the user which is the owner of this domain, and click <code>edit settings</code>. | ||
[[File:customdomain6.jpg]] | [[File:customdomain6.jpg|500px|right]] | ||
Go to | Go to Advanced Settings and change the nameservers to the ones provided by Cloudflare (like I did here). | ||
[[File:customdomain1.jpg]] | [[File:customdomain1.jpg|500px|right]] | ||
Now back to | Now, back to Cloudflare, find the SSL settings. | ||
[[File:customdomain2.jpg]] | [[File:customdomain2.jpg|500px|right]] | ||
Set | Set SSL to <code>Full (Strict)</code>, which is Cloudflare's recommendation for security. | ||
Back in your Hestia control panel, you can go to the user that owns the site, to the site, to the site options, and check SSL and Obtain Your Own. | |||
[[File:Vpsnode3.jpg|500px|right]] | |||
And with that, your domain should be connected and secure. | |||
{{Info|It may show a warning next to the URL for the Namecheap site because you are self-creating your SSL. At least it isn't a real security risk.}} | |||
Latest revision as of 03:30, 7 October 2025
Here are two options for domains.
Setting up Custom Domain via Namecheap
Essentially, for Namecheap, just follow this tutorial and be sure to ask an administrator (tell them your domain) to set up your DNS if you are using HelioHost's nameservers. That's really all you need to do.
Setting up Custom Domain via Cloudflare
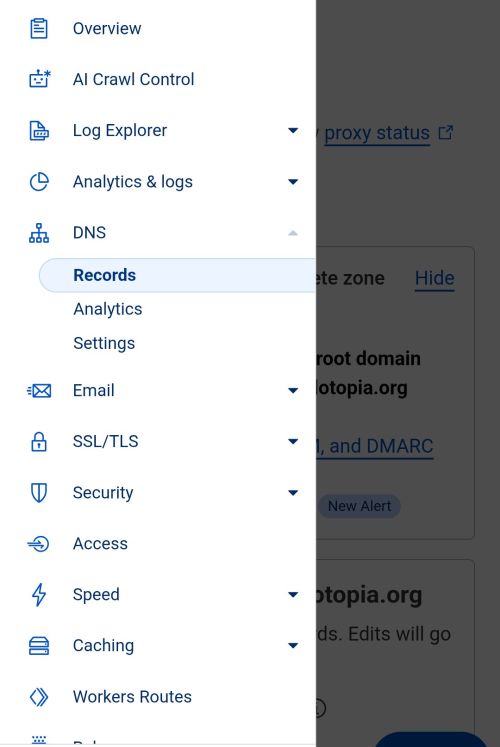
First, let's configure DNS. Go to the DNS option on the dashboard and then to Records.
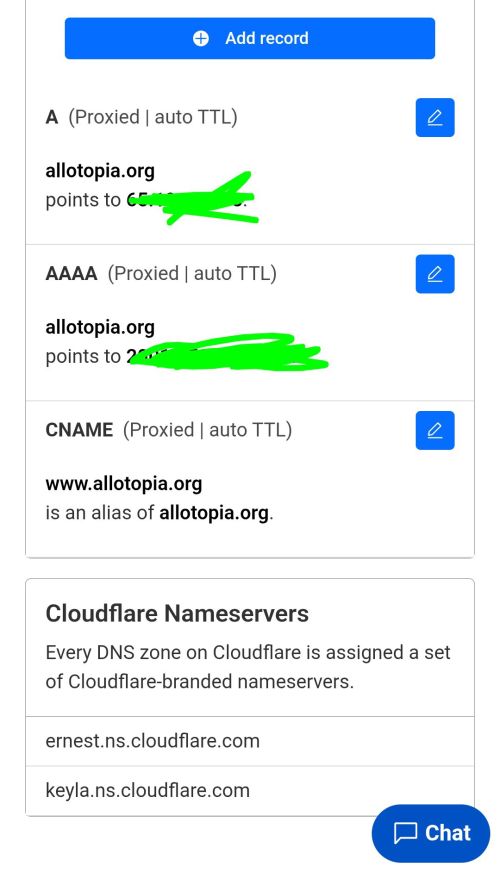
Grab the IPv4 address from your HelioHost email and create an A record. Do the same with the IPv6 address and AAAA record. Also, feel free to make a CNAME record (which will allow www to redirect to your main site).
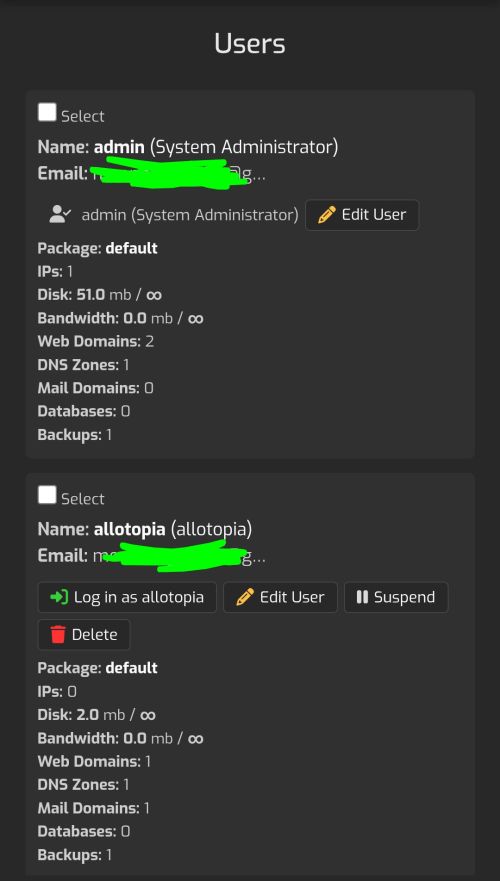
Now, on to the Hestia control panel. Go to Users, find the user which is the owner of this domain, and click edit settings.
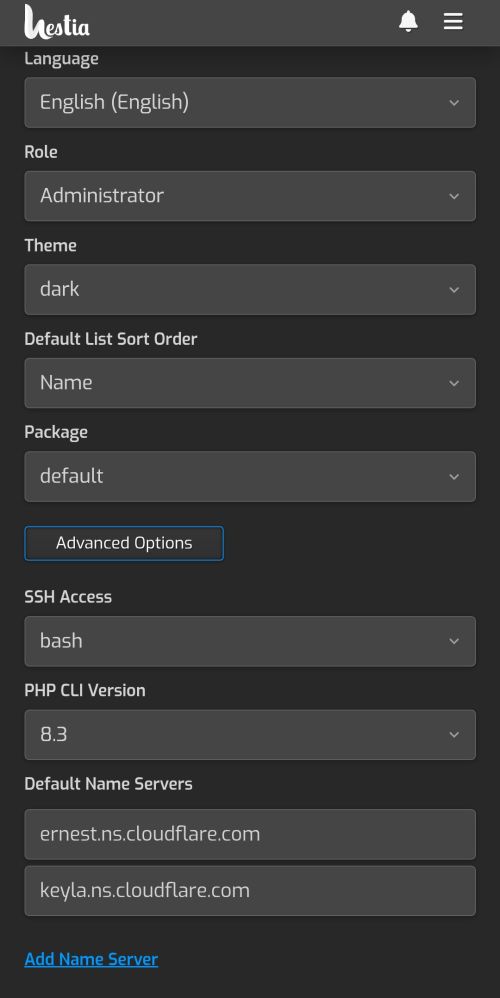
Go to Advanced Settings and change the nameservers to the ones provided by Cloudflare (like I did here).
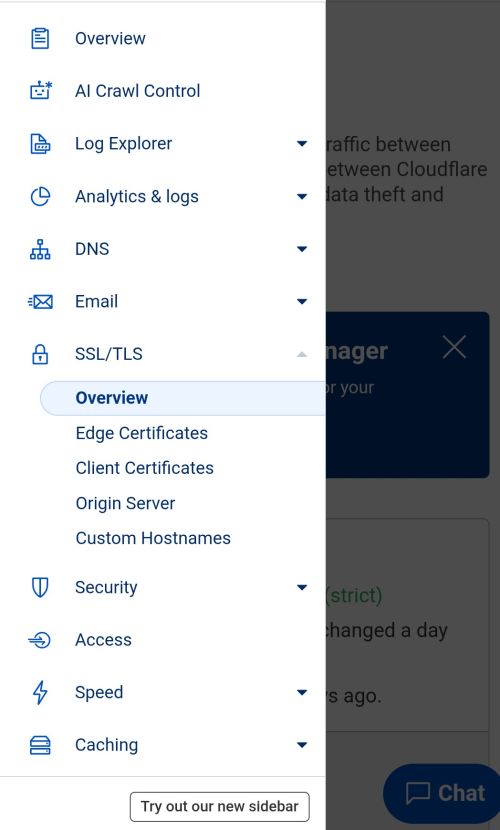
Now, back to Cloudflare, find the SSL settings.
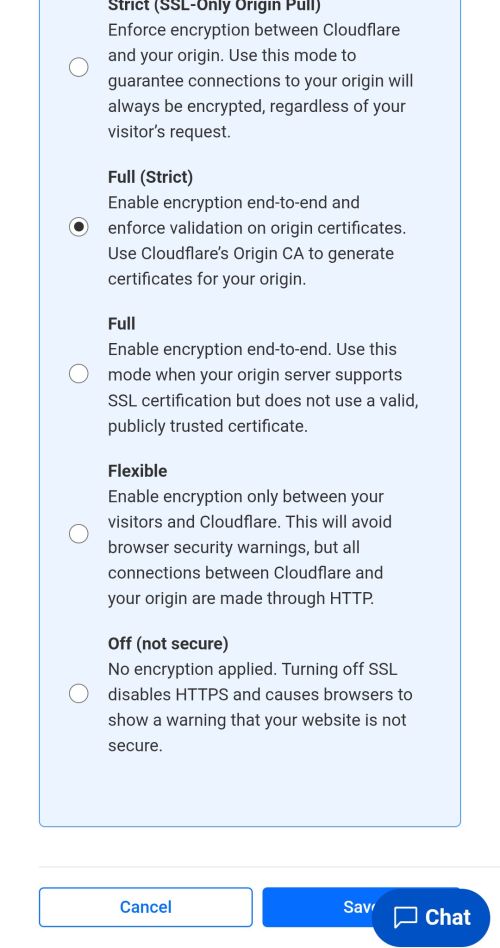
Set SSL to Full (Strict), which is Cloudflare's recommendation for security.
Back in your Hestia control panel, you can go to the user that owns the site, to the site, to the site options, and check SSL and Obtain Your Own.
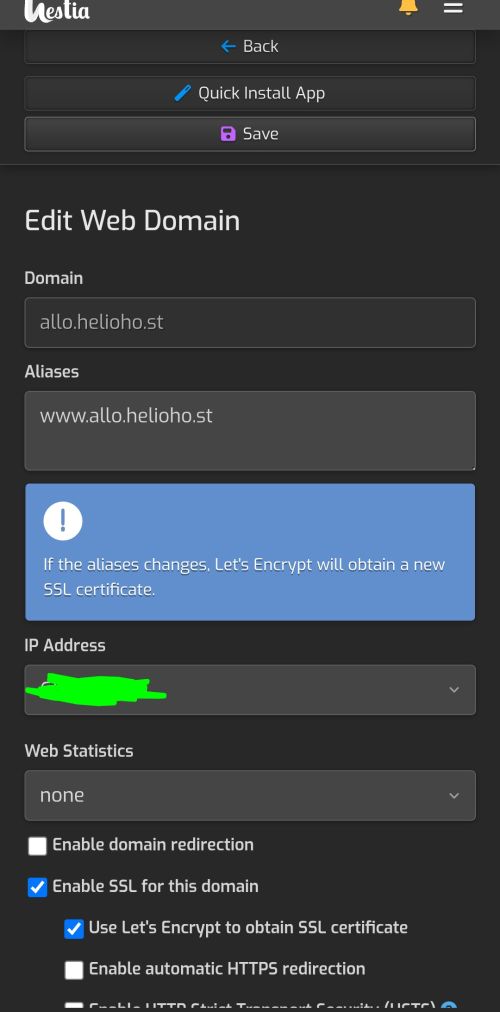
And with that, your domain should be connected and secure.
