Gatsby
Gatsby
What is Gatsby?
Gatsby is an open-source static site generator built on top of Node.js using React and GraphQL. It provides over 2500 plugins to create static sites based on Markdown documents, MDX (Markdown with JSX), images, and much more.
This tutorial offers an alternative method for creating a website or blog, designed for users who want to avoid the risk of account suspension due to high server load from other blog creation apps.
Unlike WordPress, which runs PHP code and queries a database on every visit, increasing your account load even more with plugins and heavy themes, Gatsby can generate static pages, enabling users to deploy static quick-loading sites that don't carry the same risk of account suspension like WordPress sites often do.
System Requirements
This tutorial has been created on Windows 11 without WSL (Windows Subsystem for Linux) installed. However, Windows users with WSL/WSL2 and Linux users should also be able to follow the steps below, using the equivalent commands for their system.
Before continuing with this tutorial, please visit the links above and install VS Code and the latest LTS (Long-Term Support) version of Node.js.
About VS Code
Visual Studio Code, usually called VS Code (or VSCode), is a free IDE (Integrated Development Environment). It's a popular choice for developers since it offers debugging support, code syntax highlighting, intelligent code completion, embedded Git/GitHub version control, different color themes, extensions, and more.
This tutorial will use VS Code's text editing functionality, the built-in file explorer menu, and the built-in terminal command line.
Note: VS Code is a different product than the very similarly-named 'Visual Studio' app.
About Node.js
Node is a free and open-source JavaScript runtime environment. As a HelioHost user, you may already know that Node apps often require a lot of server resources. Running a Node.js app on our shared hosting servers can risk your account being suspended for high server usage on Tommy and Johnny or charged for overages on Morty.
In this tutorial, we will use Node to run Gatsby in a development environment on your local computer, not HelioHost's servers. Gatsby also uses Node during the build process to convert your project into a static site that you can upload to your HelioHost file storage. This tutorial only runs Node on your local machine.
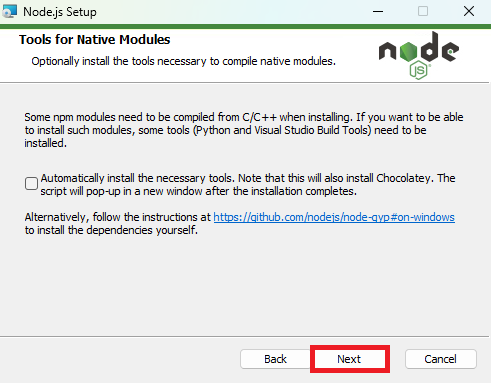
During the Node.js install process, you may be asked about installing 'Tools for Native Modules'. You can leave the checkbox unchecked and click on the 'Next' button.
Nice to Have
- Knowledge of basic Linux commands such as
cdormkdir
Getting Started
Open VS Code
To begin building your Gatsby site, first open VS Code. If this is your first time using VS Code, you will see a 'Walkthrough: Setup VS Code' page, offering the chance to set up Copilot, choose a theme, etc. These steps are not needed for this tutorial, so click on the 'Mark Done' link.
You will then see a 'Welcome' page where you can optionally uncheck the 'Show welcome page on startup' box and close the Welcome page by clicking on the 'X' on the file tab.
Open the VS Code Terminal
Inside VS Code, navigate to: Terminal > New Terminal
You should see the terminal window at the bottom of your VS Code app.
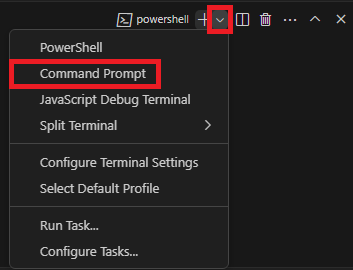
Change the terminal type from 'PowerShell' to 'Command Prompt' by clicking on the little down arrow on the right side of the terminal to open the selection menu and choose 'Command Prompt'.
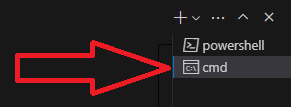
You should see the 'cmd' terminal line highlighted, confirming it is active and selected.
Confirm that Node.js is Installed
Enter the code below into your cmd terminal window, and press Enter:
node -v
If Node.js has been installed correctly, you should see a message confirming the Node version number:
Git
Git is a useful tool for version control, allowing you to track changes and revert to previous versions if needed. We won't use it for this tutorial, but the Gatsby installer needs Git installed to set up our site successfully. To install Git, you can either:
- Download the Git installer from git-scm.com, or
- Use the Windows package manager to install it from the command line with the 'winget install --id Git.Git -e --source winget' command.
For this tutorial, we will use the second option. Paste the following code into your command terminal: winget install --id Git.Git -e --source winget
The Git installer will need Administrator permissions, so keep an eye out for the Windows system prompt. Once the process finishes, you should see a 'Successfully installed' confirmation message in your command terminal
Create a New Gatsby Site
Gatsby sites are highly customizable, with lots of custom themes available. For this tutorial, we will use their basic starter. If you wish to navigate to a different directory, you can use the Linux command cd. However, we will create our Gatsby site project inside the Windows user system directory for this tutorial.
Note: You do not need to create a new directory for your Gatsby project. This will be handled as part of the Gatsby site creation process.
In the code example below, we've decided to name the Gatsby project folder 'my-blog'.
Paste the following code into the VS Code cmd terminal and press Enter:
npm init gatsby my-blog -- -y
You will see a message of 'Installing Gatsby' in the terminal, which may last for a few minutes.
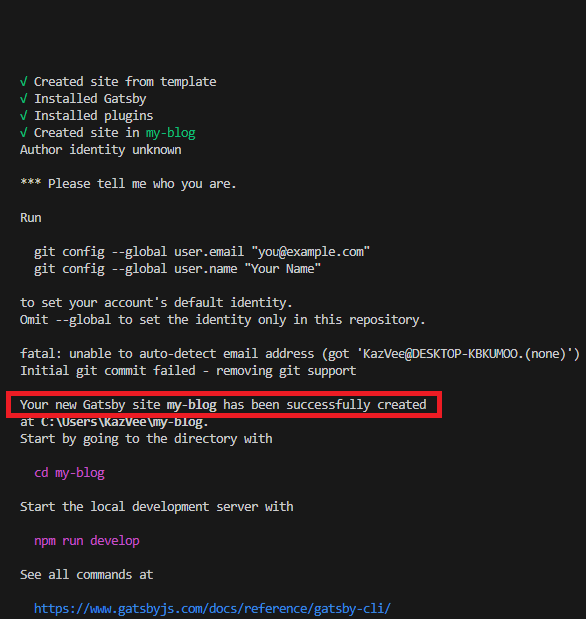
Note: If you see a message during the installation saying 'fatal: unable to auto-detect email address' and 'Initial git commit failed - removing git support' it means Git hasn't been configured with your user email and name. Git support was removed as a result, which is fine for this tutorial.
Once the installation process finishes, you should see a message saying 'Your new Gatsby site my-blog has been successfully created'.
Run the Development Site
Once Gatsby is installed, navigate into the project folder (which we named 'my-blog'), with the cd my-blog command.
Next, start Gatsby in a development environment on your local machine with the npm run develop command. Once the site is ready for local preview, you will see a message saying 'You can now view my-blog in the browser'.
To take a first look at the site created, open a web browser window and go to http://localhost:8000 (or press Ctrl + Click on the link provided in the terminal) to open the site on your local machine.
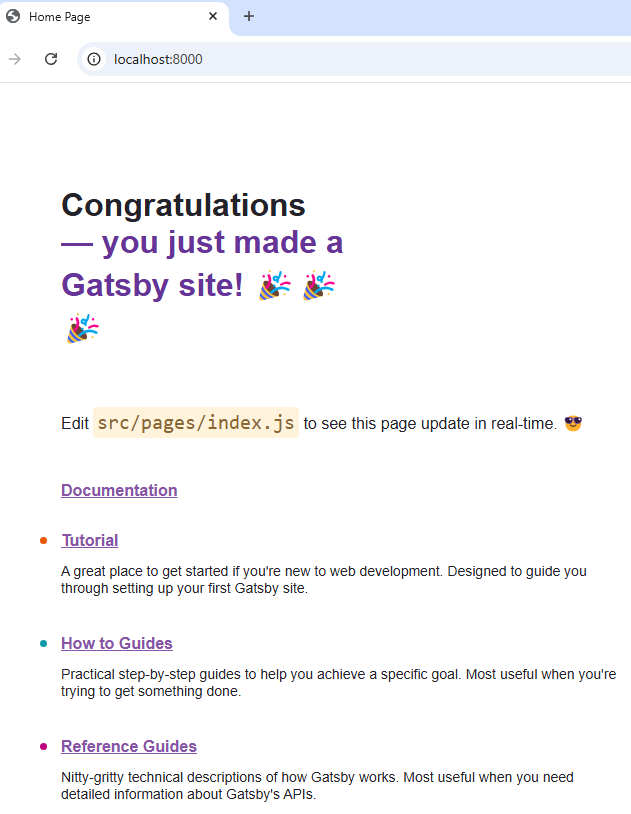
If everything was done correctly, you should see the 'Congratulations - you just made a Gatsby site' page in your browser.
Editing the Gatsby Site
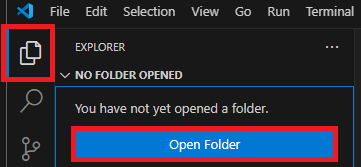
Go back into VS Code and click on the square 'Explorer' button, and then click on the blue 'Open Folder' button.
Find and Open the Gatsby Site Folder
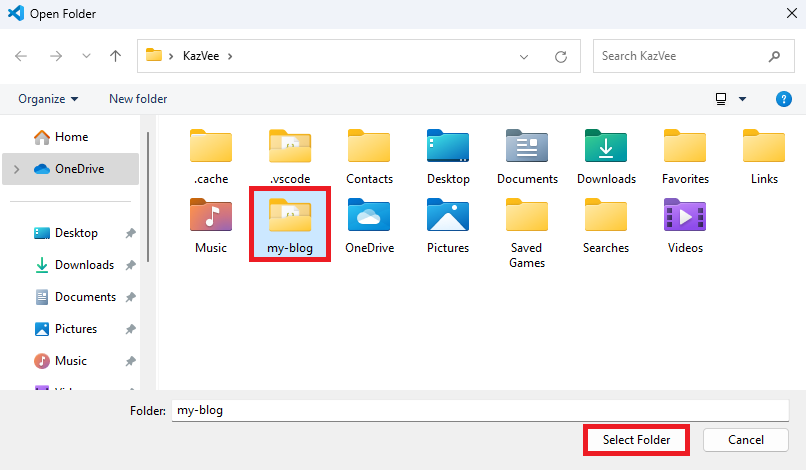
Locate the 'my-blog' folder (or whatever you named yours) on your machine, click on the folder once to highlight it, and then click on the 'Select Folder' button to open it in VS Code.
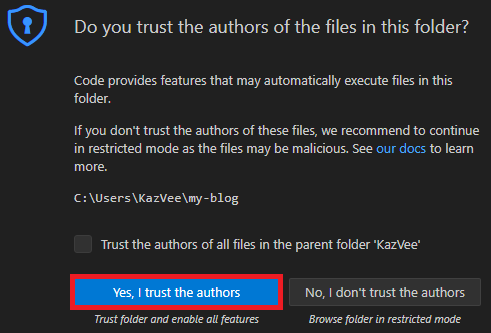
You may see a popup window asking 'Do you trust the authors of the files in this folder?'. Click on the blue 'Yes, I trust the authors' button.
If you did not uncheck the 'Show welcome page on startup' earlier in this tutorial, you will see the Welcome page again. Click on the 'X' in the tab window to close the Welcome screen.
You should see your files along the left side menu bar inside VS Code.
Restart the Gatsby Site running on LocalHost
You will probably need to reopen the Terminal, so once again go to: Terminal > New Terminal
As we did earlier, change the Terminal type again from 'PowerShell' to 'Command Prompt' by clicking on the little down arrow on the right side of the terminal to open the selection menu and choose 'Command Prompt'. (You may now see a new list option called 'Git Bash', but we will not use this during the tutorial.)
Once again, you should see the cmd terminal line highlighted, confirming it is active and selected.
In the cmd terminal window, enter the command npm run develop to start Gatsby running again on your local machine.
Open a web browser window and go to http://localhost:8000 (or press Ctrl + Click on the link provided in the terminal) to open the site on your local machine.
Once again, if everything was done correctly, you should see the 'Congratulations — you just made a Gatsby site' page in your browser.
Editing Your Site
Gatsby provides some links on the 'Congratulations' page about where to find documentation, how-to guides, tutorials, reference guides, and more. We encourage you to explore these on your own to keep improving your site once you complete this basic tutorial.
For now, we will edit the src/pages/index.js file, so we can see our updates in real-time.
Edit the Index Page
Using the left side file explorer menu inside VS Code, go to: src > pages > index.js
Scroll down in the file to about line 126, and replace this code:
const IndexPage = () => {
  return (
    <main style={pageStyles}>
      <h1 style={headingStyles}>
        Congratulations
        <br />
        <span style={headingAccentStyles}>— you just made a Gatsby site! 🎉🎉🎉</span>
      </h1>
      <p style={paragraphStyles}>
        Edit <code style={codeStyles}>src/pages/index.js</code> to see this page
        update in real-time. 😎
      </p>
With this code instead:
const IndexPage = () => {

  const timestamp = new Date().toLocaleString('en-US', {
    weekday: 'long',   // Full name of the day of the week (e.g., 'Monday')
    year: 'numeric',   // The year in numeric format (e.g., '2025')
    month: 'long',     // Full name of the month (e.g., 'April')
    day: 'numeric',    // The day of the month (e.g., '5')
    hour: 'numeric',   // The hour of the day (e.g., '2', assuming 2:00 PM)
    minute: 'numeric', // The minute of the hour (e.g., '30')
    hour12: true,      // Use 12-hour clock (AM/PM). If set to false, it would be 24-hour (e.g., 14:30 for 2:30 PM)
  })

  return (
    <main style={pageStyles}>
      <h1 style={headingStyles}>
        Welcome
        <br />
        <span style={headingAccentStyles}>to my Blog! 😎</span>
      </h1>

      <p style={descriptionStyle}>
        HelioHost Rocks! 🌞
      </p>
      <p style={{ ...paragraphStyles, fontStyle: 'italic', color: '#663399' }}>
        Published on: <strong>{timestamp}</strong>
      </p>
Make sure you save the file inside VS Code.
View Your Site
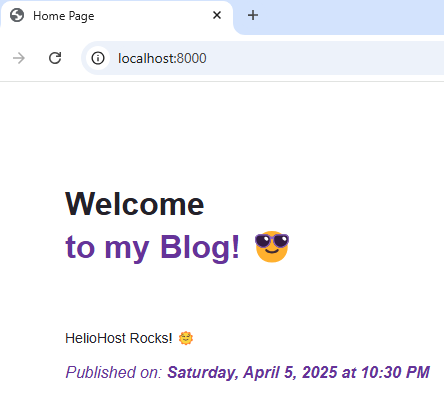
Check your site running in the browser at http://localhost:8000, and you should see the new content.
Deploy Your Gatsby Site
Next, let's publish this site and share it with the world. Right now, Gatsby is running your site in a development environment on your local machine because of the npm run develop command we ran. This is a useful way to develop the site since it ensures that code changes appear instantly without needing to refresh your site in the local browser.
To deploy the site so everyone on the internet can see it, we will need to build a production-ready version and deploy the site to a HelioHost hosting account.
Build the Production Site
Inside the VS Code cmd terminal window, press Control + C to stop Gatsby from running on local host. It will ask you 'Terminate batch job (Y/N)?', so enter Y for yes, and press Enter.
Type the following code into your cmd terminal, and press Enter:
npx gatsby build
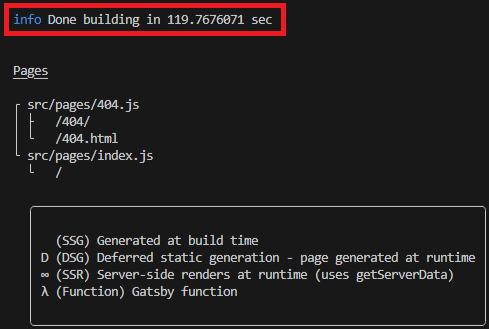
It may take a few moments to build, but you will eventually see a confirmation message that it has done building.
Upload the Gatsby Site to HelioHost
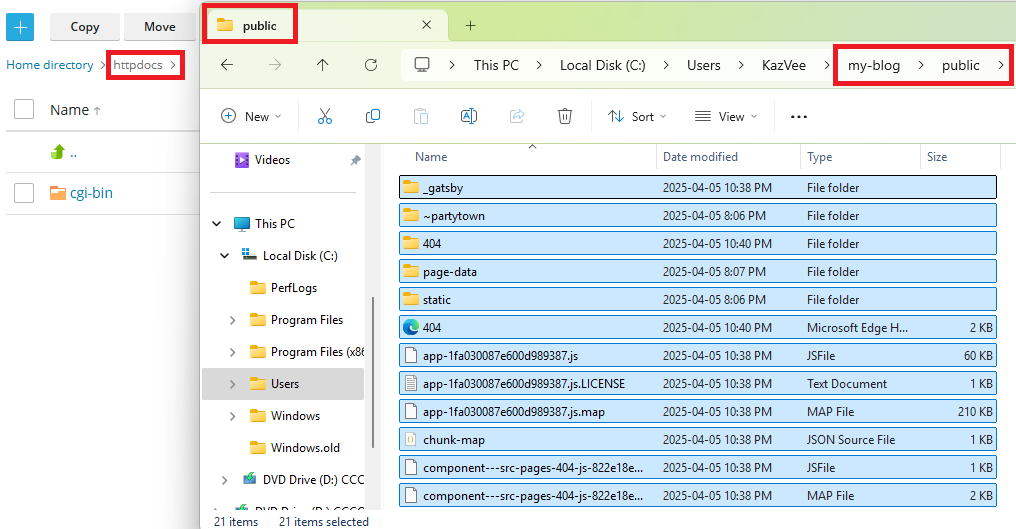
To publish the Gatsby site, you will upload everything inside the public folder (but not the public folder itself) to your HelioHost account. You can either use an FTP client like FileZilla or the Plesk File Manager. In the example below, we will use Plesk's built-in file manager.
Login to HelioHost and go to: Plesk > Websites & Domains [domain] > Dashboard > Files
Make sure you are inside your httpdocs folder inside Plesk. Select all the files and folders inside the Gatsby public folder on your machine, and drag and drop them into httpdocs.
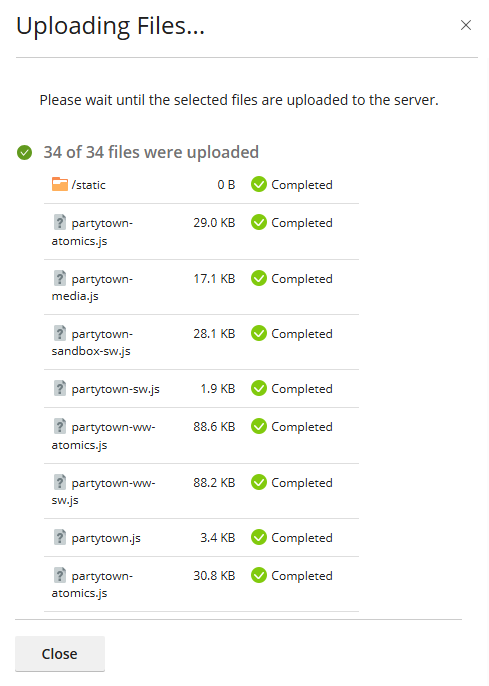
It may take a minute or two to finish, but you will see a confirmation message in Plesk once all the files have successfully been uploaded.
Visit Your HelioHost Site
Visit your website at 'domain.helioho.st', and if everything has been done correctly, you should see the 'Welcome to my Blog' page we created.
Update Your Site
To add more content, the process will be similar to what we've already done above:
- Open your project folder inside VS Code
- Open the Terminal, switch the terminal type to 'cmd', and run the
npm run developcommand. - Open a browser window to view the Gatsby site running on your local machine at http://localhost:8000.
- Create new files, or edit existing files, making sure to save your changes
- Stop your development environment in the terminal with Ctrl + C and then answer Yes to stop the batch job.
- Build your updated site by typing
npx run buildinto the terminal window. - Upload the entire contents of Gatsby's public folder into your httpdocs folder in Plesk on your HelioHost account.
Further Self-Learning
Now that you know how to edit the index page, some other quick ways to personalize your Gatsby site even more are:
- Go back to the 'index.js' page inside src > pages, scroll all the way to the bottom, and edit the
<title>Home Page</title>to something else. This is the text that displays in your browser tab when you visit your site. - Edit the 'index.js' page to remove the other placeholder content.
- Add more files into the 'pages' folder and link to them from your main index page.
- Explore the Gatsby documentation to learn even more ways to customize your site.
Further Support
If you cannot view your published site after following the above steps, please go back and check every step again to make sure nothing was missed. After doing this, if you are still stuck, please check your account error logs, since these will often provide information that can help you resolve the problem. If you're still not sure how to resolve the issue, please feel free to post a new topic in the Customer Support forum. Make sure you provide:
- Your hosting account username
- Details of the problem, including any error messages received
